Radio Eyes Help
You may modify the contents of the random access radio source files using the Source File Editor. Before attempting to edit any of these files, you should back the file up by copying it to a safe place!

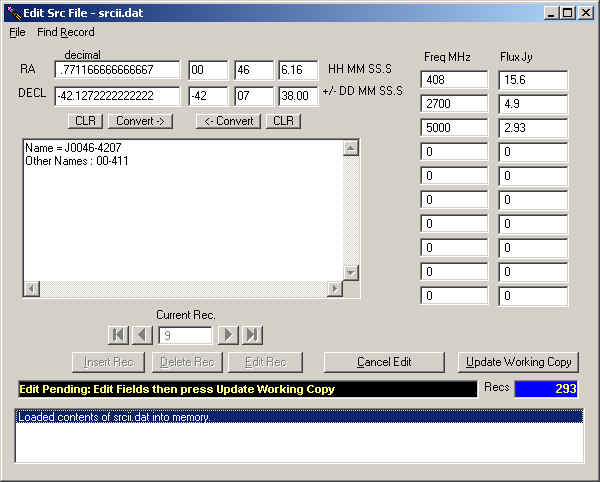
The Source File editor is called via the Tools/Data File Tools/ Source File Editor menu option from the main sky map window. This tool will operate only on the random access radio source files. You may convert standard text radio source files into the random access format using another tool. The main components of these files are:
Within the comment field Name = X lines are read as aliases for the radio source object.
To load a radio source file into the editor select File / Load Source File into Working Copy. The original source file will not be updated with your changes until you later select File / Update xxx.dat With Changes or Save As to the same file name as the original file. I re-iterate that you should save a backup copy of the original file in case you make changes that you later regret. A handy way to do this is to load the file into the working copy and then Save As to different file name.
Use the arrow keys to each side of the Current Record text box to navigate to the desired record. You may also type in the record number in this box and press enter. A third method of finding a record uses the Find Record menu option.
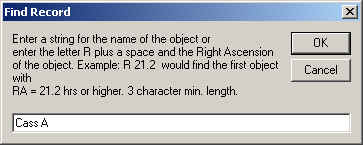
This dialog will find a record with containing a given string in the comment field. You may also use the dialog to go to a record of a given RA (or the next highest RA ) by typing in a capital R followed by a space and the decimal RA number.
Editing a Record begins with pressing the Edit Rec. button. This makes all of the field boxes editable. Changes to RA or DECL should seldom be made however, be aware that these values are displayable in decimal and HHMMSS and DDMMSS formats. The CLR buttons clear the fields above them. Converting between forms occurs when pressing the small conversion buttons below these fields. After making changes to the fields, press either the Update Working Copy or Cancel Edit button as appropriate.
New Records can be created manually by pressing the Insert Rec. button. The following dialog box appears:
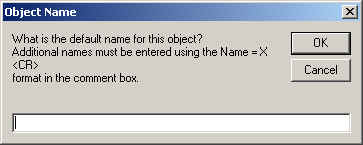
The name you enter for the new object will be its default name. Additional names may be later added in the comments using the Name = X format. Press OK after entering the name you want to use. Then enter the right ascension in and declination in the appropriate boxes. You should then add at least one pair of frequency / flux values. The frequency should be in megahertz and the flux should be in Janskys. Add comments as desired to the comment field. These comments will later appear in Info Windows for the object.
After all the desired information has been input, press the Update Working Copy button. The following dialoge will appear:
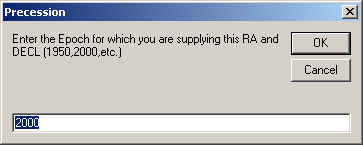
This dialog prompts you to input the Epoch for which the coordinates (RADEC) that you have used refer to. All source files need to be saved for Epoch 2000, however, if your source for the position information is from a different Epoch (1950 is sometimes used) , then entering that year here will allow the program to modify (Precess) the coordinates into Epoch 2000 if needed. After pressing OK the record will inserted in RA order into the working copy.
Again: Your changes are occurring only to the working copy in memory and will not be permanent until you make them so with File / Update xxx.dat With Changes or Save As to the same file name as the original file.
File/ Import Records allows combing of two catalogs. This option is enabled only after a catalog has first been loaded into the working copy. After pressing this menu option you are prompted to load the second catalog. You are then informed of the file size of the import catalog and asked whether or not to proceed. Proceeding produces the following dialog:
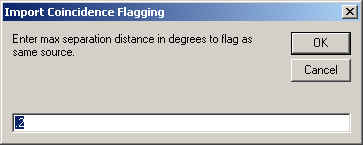
This is an important dialog box! Radio catalogs may contain references to the same object however, these are unlikely to contain exactly the same coordinates for the object due to measurement errors. You should make sure you understand the potential measurement errors of both catalogs. It is also important to take note of the sensitivity of the catalog measurements. Very sensitive surveys produce many more sources with smaller separations. It is thus best to use this Import Records feature with catalogs limited to stronger sources. It then becomes easier to determine when both catalogs are referring to the same source. The Import Coincidence Flagging dialog box allows you to enter the maximum separation of the coordinates at which the object records are considered to be referring to the same object. This input is in degrees. How coincidences are handled will depend on your answers to later dialog boxes.

Set the minimum flux for records in the Import catalog that you wish to import. Setting to 0 (zero) imports all records.
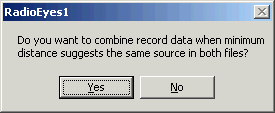
This dialog asks if you want to combine information from both catalogs into one record when the records appear to refer to the same physical source. If you press yes here, then new flux data will be imported along with comments into the working copy record for each coinciding source. The coordinates will be assumed to be those of the original working copy record. Finally you will receive the following prompt.
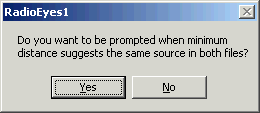
Unless you are sure of there is no significant overlap in the catalogs that you are combining, it is highly suggested that you answer yes to this prompt. Otherwise, coincidences in position will be treated automatically and you may get multiple entries that you do not want. Clicking yes means that you will be prompted for what you want to do each time a position coincidence is detected based upon the separation you specified above.
Assuming you asked to be prompted you will receive a prompt panel similar to the one below when a coincidence is detected:

This panel occurs below the data on the editor screen containing the coinciding record from your working copy file. Thus you can compare the contents and decide intelligently if you want to Combine, Import as a new record, or Skip the importation of this record. Cancel All stops the whole importation process and reloads the original working copy catalog file. Stop Prompts puts everything back on automatic, and you will quit receiving these prompt panels.
After all records have been examined any new records will be sorted into the working memory copy of the original catalog file. It is best to manually step through the catalog to look for problems and then update the original catalog or Save As to produce a new catalog based on the importing you have done.